User:James D Watson/Using Jmol
From Proteopedia
Contents |
Introduction to Jmol
Jmol is a commonly used molecular graphics viewer. The aim of this tutorial is to provide you with an introduction to some of the common manipulations to help you understand protein structure data.
- the mouse
- the menu
- the console
The Mouse
|
- Rotation
- Translation
- Zooming
The most basic interaction with a molecule involves rotating it around in the viewer. To freely rotate the molecule yourself, left-click and drag on it. Drag the cursor up and down for x-axis rotation, left-right for y-axis rotation.
Occasionally it is necessary to translocate the protein along an axis. In order to do so yourself, hold down shift, then double-click and drag on the structure. You will see the molecule follow your mouse movements (up, down, left and right).
It is common to zoom in on particular aspects of a molecule. To zoom the molecule yourself, shift-click and drag. Drag the cursor down to zoom in, drag it up to zoom out.
The Menu
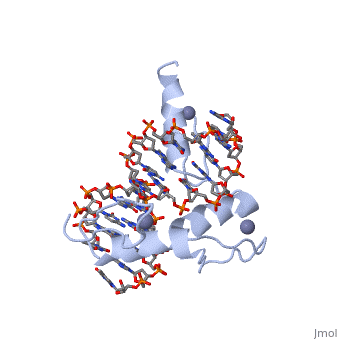
In this section we will be looking at the structure of the human deoxy-haemoglobin protein (PDB entry 4HHB). The display shown here clearly shows the folding patterns of the polypeptide chains, and the arrangement of the chains with one another. However, it does not give you an accurate picture of the shape of the molecule, nor the significance of the bound ligand. In this tutorial we will use the menu options to change the display in order to highlight these different aspects. Throughout this section, we will represent selections using the Jmol menu in this style.
Selecting and rendering
|
In order to access the Jmol menu click on the word "Jmol" in the lower right corner of the structure display area. The main panel of the Jmol menu will appear. (To close the menu without using it, click anywhere else in the structure window).
It is vitally important to understand that all actions are performed on what was last selected. If the display does not change as you expect it to, doubly check what you have selected, make the selection again and redisplay. To select something via the main panel of the Jmol menu, move the cursor over the word Select. This will bring up a selection of sub-menus, click on All. The whole menu will disappear, and Jmol will perform the task of selecting all the atoms in the structure, please note that the display will not change yet.
In order to change the display you need to "render" your selection. To render, access the Jmol main menu again and place the cursor over Style to see its sub-menu. Move the cursor to Atoms then click on 100% van der Waals. The menu will disappear and the display will change so that each atom is represented as a solid sphere (commonly called "spacefill").
Try this for yourself and if you want to check that your menu selections worked correctly you can click on the "Check Section" links. These will change the Jmol image to show what the menu selections should have resulted in.
From now on we will represent successive menu selections in the following way:
Select | All
Main | Style | Atoms | 100% van der Waals
This will repeat the steps taken above. .
If you wished to undo the above selection then make the following menu choices:
Select | All
Main | Style | Atoms | Off
Bound ligands and solvent
Displaying the entire protein as spacefill spheres gives a better impression of the actual shape of the protein. In this case the four subunits are clearly packed together with little space between them. It is also evident that there are a number of small molecules bound to the protein surface. These are often solvent molecules (water, deuterium, etc) or artefacts of the crystallisation process (glycerol, etc), but they can also represent substrate mimics, inhibitors and cofactors.
|
In the example shown there are a number of water molecules which is confusing the identification of any ligands. To remove these atoms:
Select | Hetero | All Water
Main | Style | Atoms | Off
This leaves the remaining bound small molecules (). Explore the structure some more to confirm the identity of these tightly bound molecules as the haem groups (Hint: Toggle off the spinning and click on the Jmol window. Moving your cursor over an atom should provide a pop-up window identifying that atom/residue).
Now let's focus in on a haem group to see how it interacts with the protein. To restrict the view to just the ligand molecules perform the following menu choices:
Select | Protein | All
Style | Atoms | Off
Main | Set picking | Select molecule then click on the two PO4 groups and any three of the haem groups
Style | Atoms | Off
Main | Set picking | Center
Click on the orange atom in the centre of the haem (iron) and the molecule should centre there - try rotating to see the effect.
A different type of view with bonds shown as sticks and atoms shown as smaller spheres) can be obtained using the following menu choices:
Main | Select | None (this resets the selection to nothing)
Main | Set picking | Select molecule (then click on the haem group to be viewed)
Style | Atoms | 25% van der Waals
Style | Bonds | 0.20A
It is known that the haem group in haemoglobin is bound tightly to a histidine residue (the proximal histidine). To identify this residue use the following set up selections:
Main | Select | None (this resets the selection to nothing)
Select | Protein | By residue name | His (the number in brackets gives the occurrence of that residue type in the protein)
Style | Atoms | 25% van der Waals
Style | Bonds | 0.20A
The screen will now fill with all the histidines in all chains, but this is cluttered. It is evident that there are two histidines particularly close to the haem group (one above and one below). To restict the view to these two groups and the haem we will use the picking tool followed by "view selected only":
Main | Select | None (this resets the selction to nothing)
Main | Set picking | Select group - then click on the haem group and the two nearby histidines.
Main | Select | Display Selected Only
A checkbox should appear and you will have one haem group and two histidines displayed in "ball-and-stick" mode (). Rotate and look at the view. The histidine closest to the haem group is the proximal histidine and the other is the distal. What do you notice about the plane of the haem ring? Why is this relevant to the structure of deoxyhaemoglobin?
This concludes a basic introduction to manipulating structures in Jmol to identify interesting features using the menu choices. This exercise is by no means exhaustive, so please feel free to explore the menus and see the effects they have.
The Jmol Console
Jmol can also be controlled using a command language based on the commands from RasMol. This is effectively a scripting system and the use of a handful of simple commands can replace the use of a greater number of menu choices. To access the Console, use the Jmol menu:
Main | Console | Open
A small popup window will appear. This is the Jmol Console, in which a cursor will be blinking - this is where you can enter commands. For a full list of commands please go to the Jmol homepage and look up the documentation at http://jmol.sourceforge.net/.
|
To quickly illustrate the power of the Jmol console, open the console in the Jmol window to the right and type the following commands (use "Ctrl+Enter" after each command to start a new line for the next command in the series):
- select all
- color cpk (colours by atom type)
- restrict *b (restricts the selection to chain b)
- centre selected
- select [HEM]&*b (select all HEM groups from chain b)
- spacefill 50% (display selected residues as 50% spacefill)
- color purple
- center selected
- select HIS &*b (select all Histidine residues from chain b)
- color green
- spacefill 50%
- restrict HEM,his63,his92
Once entered, click on the "Execute" button on the Console - you will see a number of things being written into the upper part of the Console window followed by the display changing. You can also press enter or click on "Execute" at any stage to see the effect each command has..
You can see how if you build up a series of useful scripts you can rapidly display different proteins in the same way (or highlight the same aspects). It should also be noted that you can select a list of commands from a text editor and copy-paste them into the Console command area as a single script to be run. Please feel free to play with different commands - but remember: all commands are only performed on the last selected atoms!
References and Acknowledgements
This tutorial was inspired by the "Interactive Concepts In Biochemistry" Structure Tutorials published by John Wiley & Sons (http://www3.interscience.wiley.com:8100/legacy/college/boyer/0471661791/structure/structure.htm)
Jmol: an open-source Java viewer for chemical structures in 3D. http://www.jmol.org/
RasMol: Biomolecular graphics for all http://www.openrasmol.org/. Original reference: Roger A. Sayle and E. James Milner-White, Trends in Biochemical Sciences 20(Sept):374-376, 1995.
Key reference for PDB entry 4HHB:
G.Fermi et al. (1984). The crystal structure of human deoxyhaemoglobin at 1.74 A resolution. J Mol Biol, 175, 159-174. PubMed id: 6726807.
