User:Shai Biran/Practice Proteopedia tutorial shai5
From Proteopedia
Adding a GREEN SCENE LINK
- First, let's clean things a bit. Change the heading in your page (where it says 'your heading here'). Feel free to choose any new heading you want.
Delete the two rows starting with 'This is a default text...'
- Now let's change the displayed 3D structure into the structure of GFP. In the row starting with StructureSection load change 1stp to GFP's pdb code. Hint - if you're not sure which pdb code to use, look at the GFP test page. Change the caption as well from caption='Caption for this structure’ to caption='GFP (PDB entry 1ema)'.
use the 'show preview' button to check what changed in your page.
Now that we have our 3D model on the page, let’s create a green scene link that shows 1ema as it looks in the the left part of the 2D image on the GFP Sample page where we got our text. (go back to that page to see what the picture looks like User:Shai Biran/GFP test page) To create a green scene link, we will need to use the 'Proteopedia Scene Authoring Tools'.
- After clicking edit this page, scroll down to the bold text that says “Scene authoring tools [show]” next to a colorful molecule. Click on “show” to expand the Scene Authoring Tools.
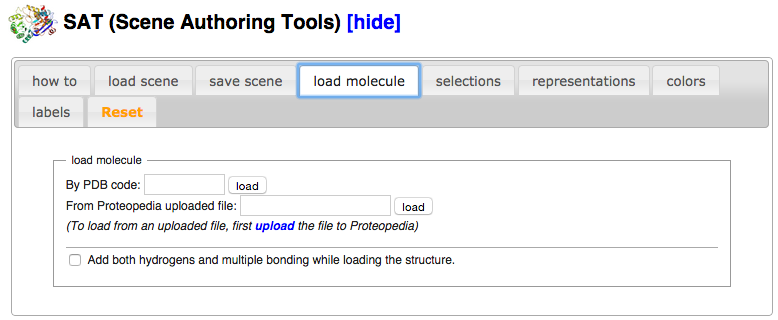
- Click on the tab “load molecule” in the Scene Authoring Tools.
- Load the PDB file 1ema by entering the PDB code “1ema” in the input box next to the words “By PDB code:” and then pressing the adjacent button marked “load”
- Now we have 1ema loaded into the Scene Authoring Tools’ Jmol applet. The idea behind the Scene Authoring Tools (SAT) is to create the exact scene that you would like to have load when your green link is clicked. This is generally done by first loading a PDB file into the SAT’s applet, then using the “selections”, “representations”, “colors”, and “labels” tabs to manipulate the 3D model into the desired state, finally saving the green scene link using the “save scene” tab.
- Our structure is currently displayed in cartoon representation. The first step in recreating the picture in the Molecule of the Month is to display the molecule in backbone representation.
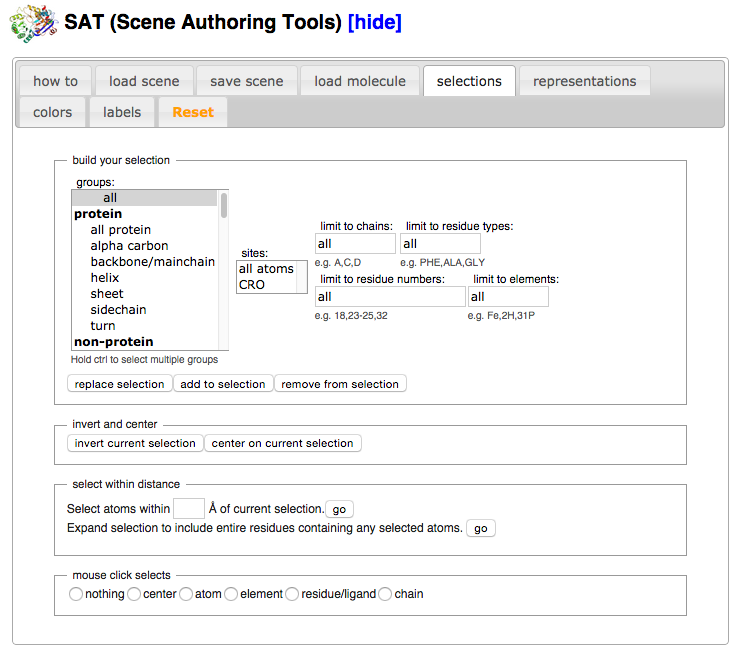
- Click on the “selections” tab.
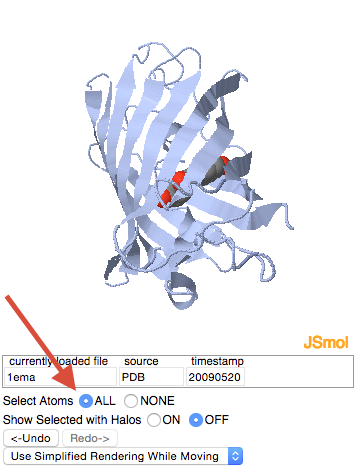
- In the “all or nothing and halos” section, click on the “select all” button.
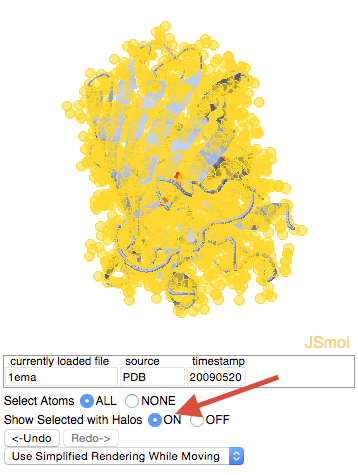
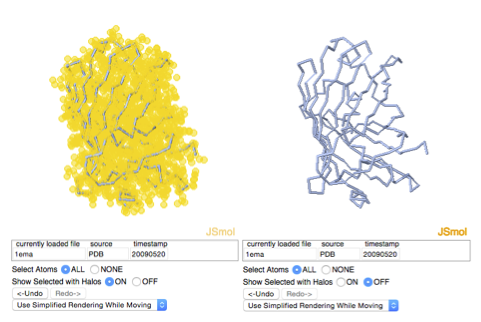
- Nothing changed because “selection halos” were not on. Turn them on by marking the checkbox next to the word “selection halos”.
Selection halos serve to show you what is currently selected. They will not be displayed when the green scene link you eventually create is clicked.
Now that we have everything selected, click on the “representations” tab of the SAT.
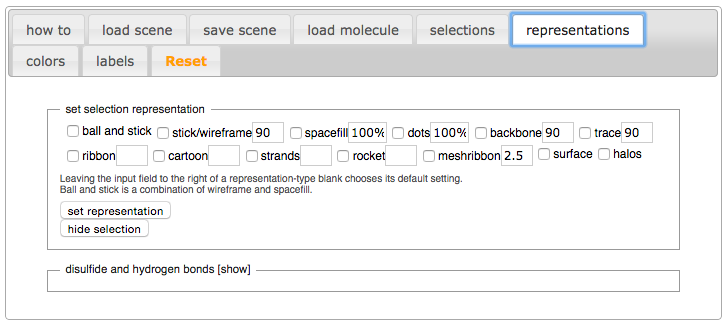
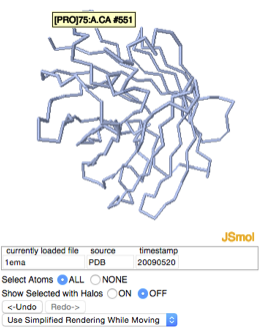
Mark the checkbox next to “backbone” in the section titled “set selection representation”. Click on the “set representation” button. Notice the representation of the 3D model has changed from cartoon to backbone. To help see this better, turn off the selection halos by unmarking the checkbox next to “selection halos”.
Now we want to select the segment of the protein that runs through the barrel and color it green. To make a selection, click on the “selections” tab. We will select the segment that runs through the barrel by its residue numbers. To do this we need to know the first and the last residue numbers that make up this segment. Notice that when you hover with your mouse over an atom in the Jmol applet, information about that atom is displayed, including the residue that atom is part of, and the residue number. Use this “hover” feature to find the residue numbers for the beginning and the end of the segment we are interested in.
Enter the starting and ending residue numbers, separated by a hyphen, into the input box under the text “limit to residue numbers:”. Before making our new selection, let’s turn on selection halos so we see the change in the selection take place. Mark the checkbox next to “selection halos”. Notice that everything is selected. Now go ahead and make the new selection by clicking “replace selection”. This will replace the old selection (everything) with our new selection (limited to a stretch of residues).
Next
